CGM Sensor Placement: Finding the Best Spot for Accurate Readings
One of the most overlooked factors in getting reliable results from a continuous glucose monitor is something as simple as where the sensor is applied. Many first-time users focus entirely on the technology itself, the app, the alerts, the graphs, without realizing that sensor placement plays a direct role in accuracy, comfort, and how long the sensor stays securely attached. Choosing the right spot on the body can mean the difference between fourteen days of smooth, reliable data and a sensor that peels off early or delivers inconsistent readings.
This guide covers everything Pakistani users of the iCan CGM i3 need to know about proper sensor placement, from the ideal locations to the spots that should be avoided entirely.
Why Placement Affects CGM Accuracy
A continuous glucose monitor measures glucose in the interstitial fluid just beneath the skin, and that measurement depends on stable, consistent tissue with minimal movement or pressure. Areas of the body that flex frequently, experience friction from clothing, or carry very little fat tissue tend to produce less reliable readings and are more likely to cause early sensor detachment.
The Role of Tissue Type
Interstitial fluid readings are most accurate in areas with a consistent layer of subcutaneous fat and minimal muscle activity directly beneath the skin. This is why certain areas of the arm are consistently recommended over areas like the abdomen in men with very lean builds, or over joints where movement is constant throughout the day.
The Role of Adhesion and Skin Movement
Beyond accuracy, placement also affects how well the adhesive patch stays attached. Areas with frequent stretching, bending, or rubbing against clothing seams are far more likely to loosen the sensor prematurely, particularly in Pakistan's warmer climate where sweating can further weaken adhesive bonds over the wear period.
The Best Spot for CGM Sensor Placement
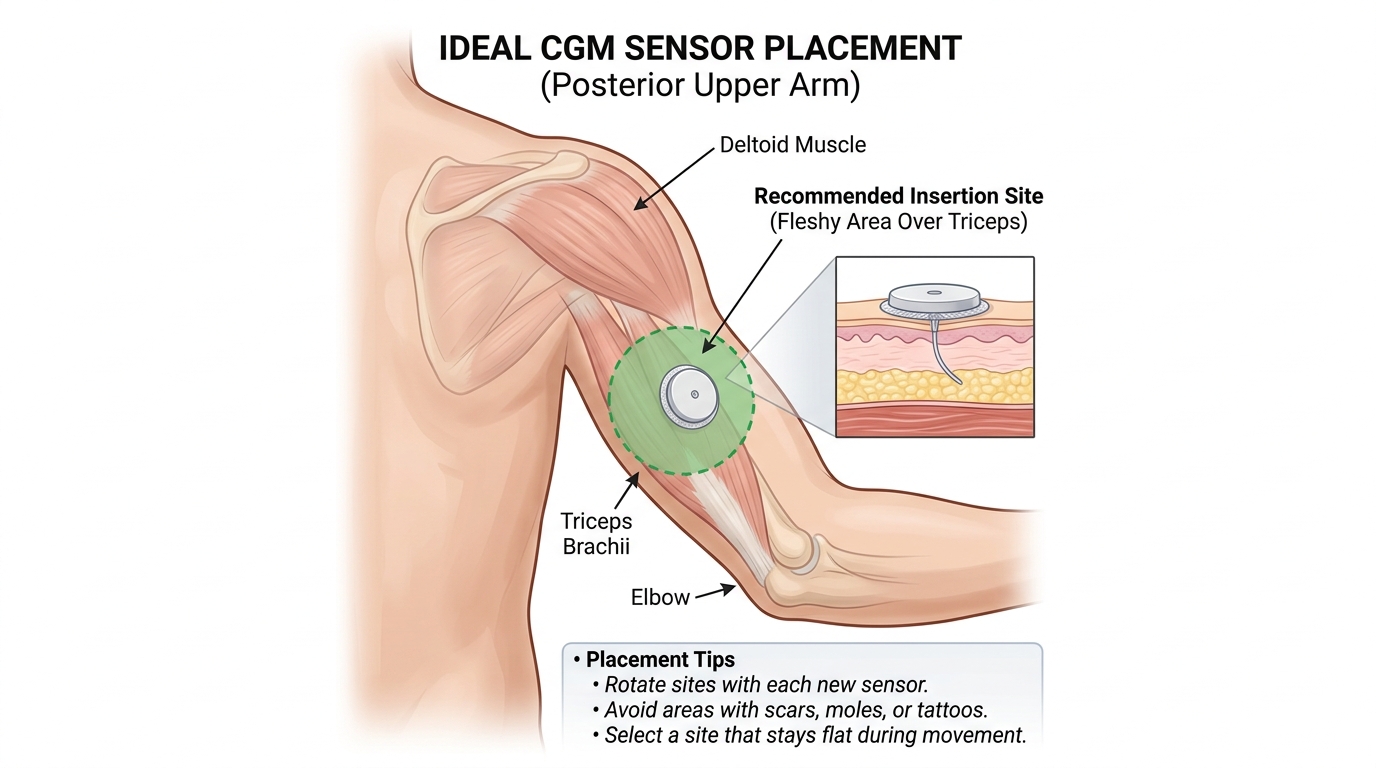
For most users, the back of the upper arm is widely considered the best spot for CGM sensor placement, and it is the location recommended by the manufacturer for the iCan CGM i3.
Why the Back of the Upper Arm Works Best
This area offers a good balance of stable fat tissue, minimal muscle movement, and low friction from everyday clothing. It is also relatively easy to reach for self-application, even though the sensor sits slightly behind the arm where it is less likely to be bumped or caught on sleeves, bags, or seatbelts during daily activity.
Ideal Positioning on the Arm
Within the upper arm, the recommended spot is roughly midway between the shoulder and elbow, positioned toward the back or side of the arm rather than directly on top, where clothing seams and watch straps are more likely to cause irritation. Avoiding the very top of the shoulder, where movement is greatest, and the area closest to the elbow, where bending is frequent, helps the sensor maintain both accuracy and adhesion throughout its full wear cycle.
Alternating Arms Between Sensors
Many long-term users develop a habit of alternating between the left and right arm with each new sensor application. This gives the skin time to recover between applications and helps avoid irritation from repeated use of the exact same spot, which can become more sensitive over time with continuous long-term monitoring.
Spots to Avoid When Applying a CGM Sensor
Just as important as knowing the best spot is understanding which areas tend to cause problems, whether through inaccurate readings, discomfort, or early sensor failure.
Areas With Heavy Muscle Activity
Placing a sensor directly over a muscle that flexes frequently, such as the bicep during regular arm movement, can lead to inconsistent readings as the tissue shifts beneath the sensor throughout the day. This is particularly relevant for people with physically active jobs or regular exercise routines.
Areas Near Joints
Both the elbow and shoulder joints involve constant bending and stretching of the surrounding skin, which puts significant strain on the sensor's adhesive patch. A sensor placed too close to either joint is far more likely to loosen or fall off before the full 14-day wear period is complete.
Areas With Frequent Clothing Friction
Waistbands, bra straps, and tight sleeve cuffs can all rub against a sensor throughout the day, gradually weakening the adhesive bond. Choosing a spot away from these pressure points significantly extends how long the sensor remains securely attached.
Scarred or Irritated Skin
Applying a sensor over scar tissue, stretch marks, moles, or any area of irritated or broken skin can affect both accuracy and comfort. Selecting smooth, healthy skin free of blemishes gives the sensor filament the best possible environment to deliver consistent readings.
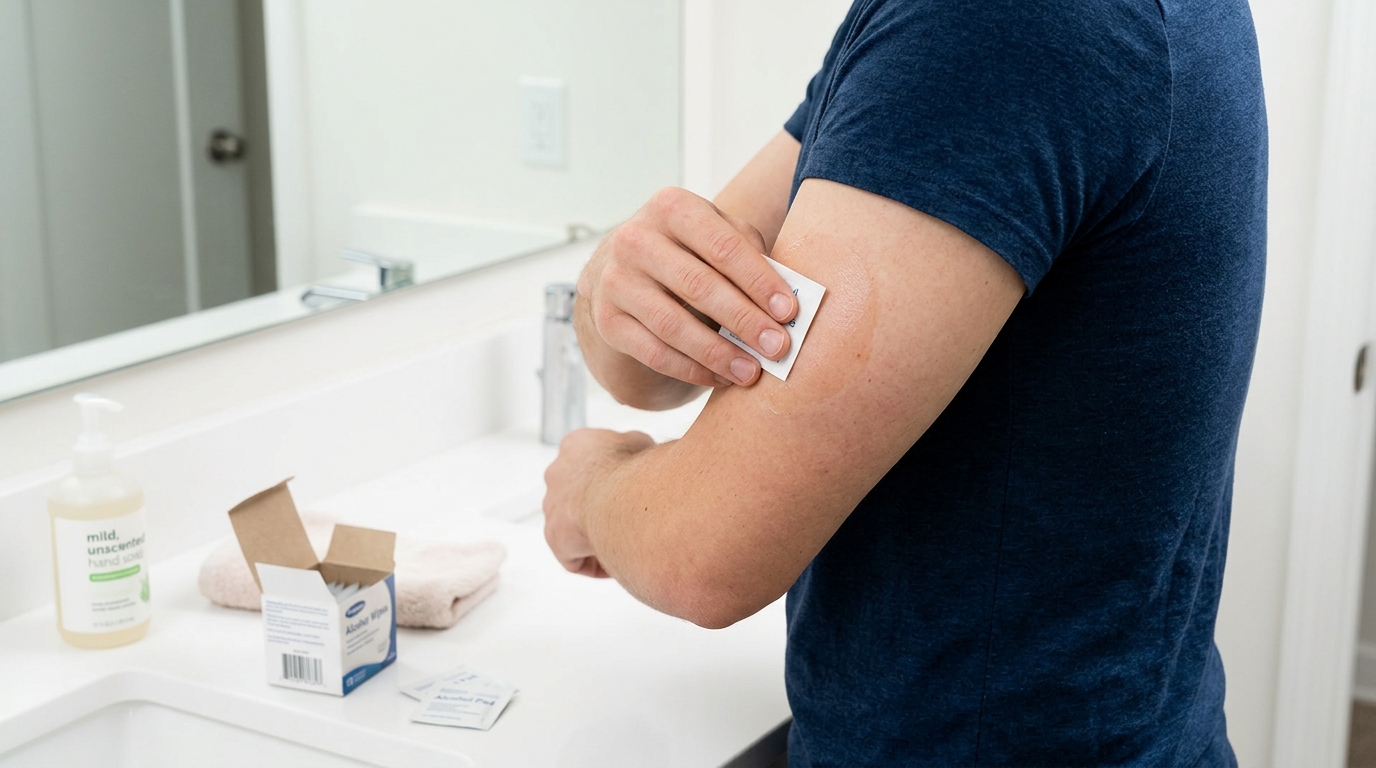
Preparing the Skin Before Application
Even the best possible spot on the body will underperform if the skin is not properly prepared before the sensor is applied. A few simple steps make a significant difference in both accuracy and adhesion.
Cleaning the Area Thoroughly
Before application, the chosen spot should be washed with mild soap and water to remove any oils, lotions, or sweat, then dried completely. Any residue left on the skin, including moisturizer or sunscreen, can interfere with how well the adhesive bonds to the surface.
Avoiding Lotions and Oils Beforehand
Many users unknowingly reduce sensor adhesion by applying body lotion or oil-based products to their arms shortly before applying a new sensor. Skipping these products for several hours before application gives the adhesive a much better chance of holding securely for the full wear period.
Letting the Skin Fully Dry
Even a small amount of moisture remaining on the skin can weaken the adhesive bond significantly. Allowing the cleaned area to air dry completely, rather than wiping it dry with a towel, generally produces the strongest and longest-lasting attachment.
Applying the iCan CGM Sensor Step by Step
Once the ideal spot has been selected and properly prepared, the actual application process for the iCan CGM i3 is designed to be quick and largely painless.
Using the Applicator Correctly
The sensor comes with an automatic applicator that inserts the filament beneath the skin in a single, swift motion. Pressing the applicator firmly and evenly against the prepared skin, without hesitation, generally results in the most comfortable and successful application.
Securing the Adhesive Patch
After the filament is inserted, the surrounding adhesive patch should be pressed firmly around its edges to ensure full contact with the skin. Taking a moment to smooth down the entire patch, particularly the edges, helps prevent early lifting during the wear period.
Confirming Sensor Activation
Following application, pairing the sensor with the companion app via Bluetooth activates a brief warm-up period before readings begin. During this time, it can help to avoid pressing directly on the newly applied sensor, giving it a chance to settle securely into place. Our earlier guide on getting started with a continuous glucose monitor covers the full setup process from unboxing to first reading in more detail.
Maintaining the Sensor Throughout Its Wear Period
Proper placement is only the first step. How the sensor is treated over the following two weeks also plays a role in how well it performs.
Protecting the Sensor During Daily Activities
Wearing loose sleeves over the sensor area, particularly during exercise or physical work, helps protect it from accidental knocks or snags. For users who enjoy swimming or regular exercise, choosing activities that avoid direct pressure on the sensor site helps maintain both comfort and adhesion.
Handling Accidental Bumps
Occasional light bumps are unlikely to affect the sensor, but a firm knock can occasionally dislodge the filament or loosen the adhesive patch. If a sensor is bumped, checking the app for any sudden changes in readings can help confirm whether the sensor is still functioning correctly.
What to Do If the Sensor Loosens Early
If the adhesive begins lifting before the end of the wear period, applying a supplementary adhesive patch, available separately, over the existing sensor can help extend its wear time without affecting the readings underneath. For more detailed troubleshooting, our guide on what to do if a sensor falls off early walks through the recommended steps.
Why Placement Matters More in Pakistan's Climate
Pakistan's generally warm and often humid climate introduces additional considerations when it comes to sensor placement and adhesion compared to cooler regions.
Managing Sweat and Adhesion
Higher temperatures and increased sweating, particularly during the summer months, can weaken adhesive bonds more quickly than in cooler climates. Choosing a placement spot away from areas prone to heavy sweating, and keeping the area as dry as possible throughout the day, helps counteract this effect.
Adjusting for Seasonal Clothing
During colder months, heavier clothing and layered sleeves can introduce more friction around the upper arm than lighter summer clothing. Being mindful of exact sensor placement relative to sleeve seams becomes especially important when transitioning between seasonal wardrobes.
Frequently Asked Questions
What is generally considered the best spot for CGM sensor placement?
The back of the upper arm, positioned midway between the shoulder and elbow, is the location most commonly recommended for the iCan CGM i3, offering a good balance of stable tissue and minimal movement.
Can I place the sensor on my abdomen instead of my arm?
While some CGM devices are approved for abdominal placement, the iCan CGM i3 is specifically designed and recommended for upper arm placement to ensure the most accurate and consistent readings.
Why did my sensor fall off before the 14-day period ended?
Early sensor detachment is often caused by placement too close to a joint, inadequate skin preparation, or exposure to heavy sweating or friction from clothing during the wear period.
Should I alternate arms between each new sensor application?
Yes, alternating between the left and right arm with each new sensor helps the skin recover between applications and reduces the likelihood of irritation over long-term continuous use.
Does sensor placement affect the accuracy of my glucose readings?
Yes, placing the sensor in an area with stable tissue and minimal movement, such as the recommended upper arm spot, produces significantly more consistent and accurate readings than placement in high-movement or high-friction areas.